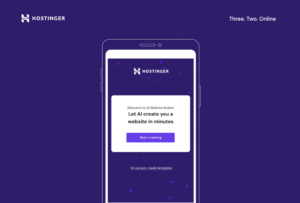
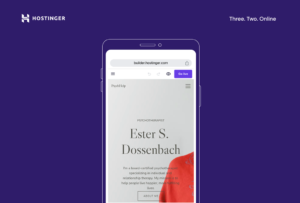
If you want to learn how to create a website with your mobile phone, Hostinger’s mobile editor is just what you need. This browser-based website editor simplifies the web development process, enabling you to build mobile-responsive websites directly from your mobile device.
This article explains what a mobile editor is and how to use one effectively. We’ll show you how to leverage the mobile editor of Hostinger Website Builder and give you tips on successfully building a mobile-friendly website.
Creating a website using Hostinger’s Mobile Editor is a great way to get online quickly, especially if you’re on the go. Here’s a step-by-step guide to help you create your site using your phone:

1. Sign Up or Log In
– **Download the Hostinger App:** If you haven’t already, download the Hostinger app from your phone’s app store.
– **Sign In:** Open the app and sign in with your Hostinger credentials or create a new account if you don’t have one.
2. Start a New Website
– **Dashboard Access:** Once logged in, navigate to the dashboard where you’ll see options for creating a new website.
– **Choose a Website Type:** Select the type of website you want to create (e.g., personal blog, business site, online store).

3. Select a Template
– **Browse Templates:** Hostinger’s Mobile Editor offers a variety of templates. Browse through them to find one that fits your needs.
– **Select a Template:** Tap on the template you like to select it.

Customize Your Website
– **Edit Text and Images:** Tap on sections of the template to edit text, upload images, and make other content changes.
– **Change Layouts:** Adjust the layout of your pages by selecting different options for sections, columns, and elements.
– **Add New Sections:** Use the editor to add new sections or elements like contact forms, galleries, or social media links.
5. Configure Settings
– **Site Settings:** Access the settings menu to configure your site’s name, tagline, and other essential details.
– **SEO Settings:** You can also manage basic SEO settings to help your site rank better in search engines.

6. Preview Your Site
– **Preview:** Before publishing, preview your website to ensure everything looks and functions as you want it to.
7. Publish Your Website
– **Publish:** Once you’re satisfied with your site, tap the publish button to make it live.
8. Manage and Update
– **Ongoing Updates:** You can continue to make updates and manage your site directly from the app as needed.
Tips for Mobile Editing:
– **Keep It Simple:** Mobile editors can be limiting compared to desktop versions, so aim for a clean and straightforward design.
– **Check Responsiveness:** Ensure your site looks good on both desktop and mobile views.
– **Save Frequently:** Save your changes regularly to avoid losing any work.
Hostinger’s Mobile Editor is designed to be user-friendly, so with a bit of experimentation, you’ll be able to create and manage a professional-looking website right from your phone.
Creating a website using Hostinger’s Mobile Editor offers a convenient and flexible way to build your online presence directly from your phone. Here’s an in-depth guide to help you navigate this process effectively.
1. Getting Started with Hostinger
Before diving into the website creation process, you’ll need to set up your Hostinger account:
1.1 Download and Install the Hostinger App
– **Access the App Store:** Open your phone’s app store (Google Play Store for Android or the Apple App Store for iOS).
– **Search for Hostinger:** Type “Hostinger” in the search bar and locate the official Hostinger app.
– **Download and Install:** Tap on the download button and wait for the app to install on your device.
1.2 Create an Account or Log In
– **Open the App:** Launch the Hostinger app from your phone’s home screen.
– **Sign Up or Log In:** If you’re a new user, follow the prompts to create a new account by providing your email address and setting a password. If you already have an account, simply log in with your existing credentials.
2. Starting a New Website
Once you’re logged into the Hostinger app, you can start creating your website:
2.1 Access the Dashboard
– **Navigate to Dashboard:** Upon logging in, you’ll be directed to the app’s dashboard. This is your central hub where you can manage your hosting services and create new websites.
2.2 Initiate Website Creation
– **Find the Website Creation Option:** Look for a button or link that says “Create New Website” or something similar.
– **Choose a Website Type:** Hostinger may offer options such as personal blog, business site, e-commerce store, or portfolio. Select the type of website that best fits your needs.
3. Choosing and Customizing a Template
Hostinger’s Mobile Editor provides various templates to kickstart your website design:
3.1 Select a Template
– Browse Available Templates: Scroll through the available templates that cater to different types of websites. These templates are pre-designed with layouts and color schemes that you can customize.
– **Preview Templates:** Tap on a template to preview it. This helps you gauge how your content will look in that design.
– **Choose Your Template:** Once you’ve found a template that fits your vision, tap to select it and move forward with customization.
3.2 Customize Your Template
– **Edit Text Content:** Tap on text boxes to edit content. You can replace placeholder text with your own information, such as your business name, tagline, and contact details.
– **Upload Images:** To add or change images, tap on image placeholders. You can upload images from your phone’s gallery or take new photos using your camera.
– **Adjust Layouts:** Customize the layout by rearranging sections, changing column widths, or modifying element placements. The mobile editor allows you to make changes by dragging and dropping elements.-
**Add Sections and Elements:** If you need additional sections like a contact form, testimonials, or a blog, look for options to add these elements. Tap on the “Add” button and choose the type of section you want to include.
4. Configuring Site Settings
With your site’s content and layout in place, it’s time to configure essential settings:
4.1 Basic Site Settings
– **Site Name and Tagline:** Access the settings menu to enter your site’s name and tagline. This information appears prominently on your website and helps with branding.
– **Navigation Menu:** Customize your navigation menu to include important pages like Home, About, Services, and Contact. Ensure the menu is intuitive and easy to navigate.
4.2 SEO Settings
– **Optimize for Search Engines:** Use the SEO settings to input meta titles and descriptions for your pages. This helps search engines understand the content of your site and improves visibility.
– **Keywords:** Add relevant keywords to your pages to enhance search engine ranking. This step is crucial for attracting organic traffic.
5. Previewing Your Website
Before making your site live, it’s important to preview it to ensure everything looks and functions correctly:
5.1 Preview Mode
– **Access Preview:** Look for a “Preview” button within the editor. This allows you to see how your site will appear to visitors.
– **Check Mobile and Desktop Views:** Ensure your site is responsive and looks good on both mobile and desktop screens. The mobile editor may offer a preview mode that simulates different device views.
5.2 Make Final Adjustments
– **Review Content:** Double-check all text for spelling and grammar errors. Ensure that images are correctly placed and that all links work as intended.
– **Test Functionality:** Click through your site’s links and forms to make sure everything is functioning properly.

6. Publishing Your Website
Once you’re satisfied with your site’s design and functionality, you’re ready to publish:
6.1 Publish Your Site
– **Find the Publish Button:** Locate the “Publish” button in the editor. This action will make your website live and accessible to the public.
– **Choose a Domain:** If you haven’t already set up a domain, Hostinger may prompt you to choose or register one. Follow the instructions to link your domain to your site.
7. Managing and Updating Your Website
Even after publishing, you’ll want to manage and update your site regularly:
7.1 Access the Editor
– **Reopen the Editor:** Use the Hostinger app to access the Mobile Editor anytime you need to make changes.
– **Update Content:** Regularly update your site with new content, promotions, or blog posts to keep it fresh and engaging.
7.2 Monitor Performance
– **Check Analytics:** Hostinger may offer analytics tools to track your site’s performance. Review visitor statistics, page views, and other metrics to understand how your site is performing.
Additional Tips for Mobile Editing
– **Keep It Simple:** Mobile editors have limitations compared to desktop versions, so aim for a clean and straightforward design that doesn’t require complex elements.
– **Check Responsiveness:** Ensure that your website looks good on various devices, including tablets and smartphones.
– **Save Frequently:** Mobile editing can be prone to glitches, so save your work frequently to avoid losing any changes.
By following these steps, you can effectively use Hostinger’s Mobile Editor to create and manage a professional-looking website directly from your phone. Whether you’re starting a personal blog or launching a business site, this mobile-friendly approach makes web development accessible and convenient.

